Community Financial Assistance Information
The Community Financial Assistance Information menu item allows users to add or update financial assistance information that is administered by the State’s UCF Program. It allows states to report information about awarded projects as well as to identify communities that receive direct financial assistance. States should report information for community financial assistance grants awarded and administered through the State UCF Program during the reporting year (i.e. from October 1 to September 30)
Adding a Grant
Instructions for adding a grant are as follows:
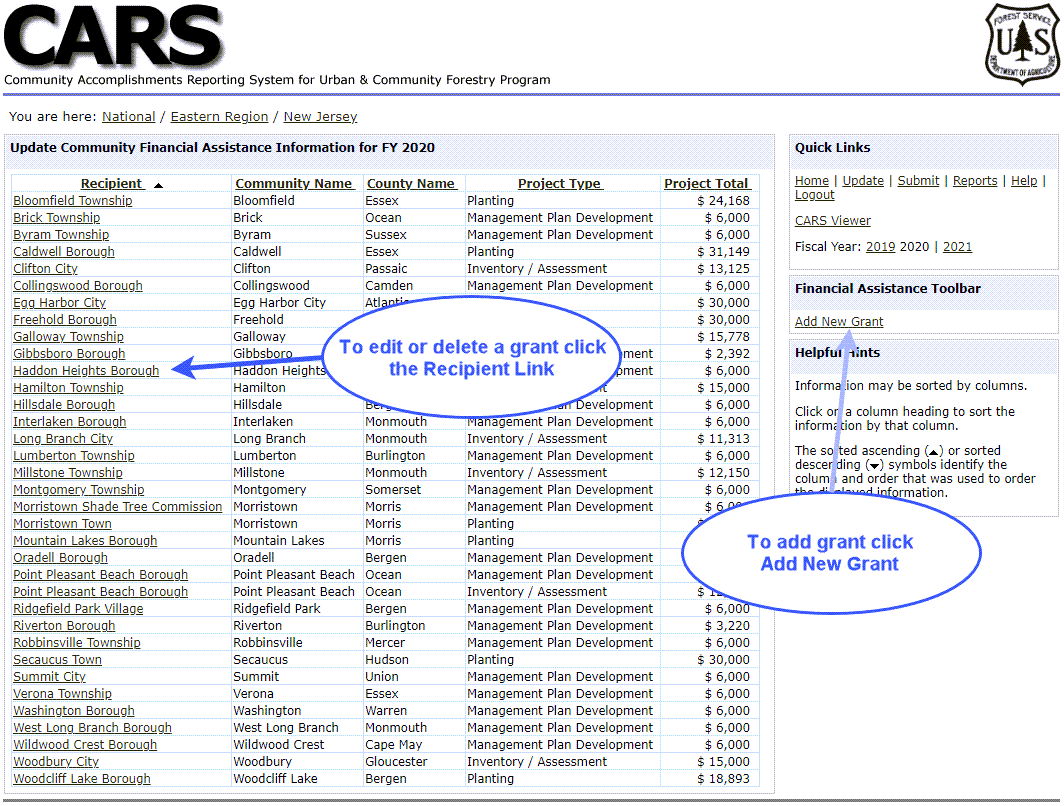
Step 1: Click on the Community Financial Assistance link on the Update menu (Figure 9). The Update Community Financial Assistance Information portlet will be displayed (Figure 15).
Step 2: Click on the Add New Grant link within the Financial Assistance Toolbar portlet on the right. The Add Grant form will be displayed (Figure 16). Required fields are identified with an asterix.
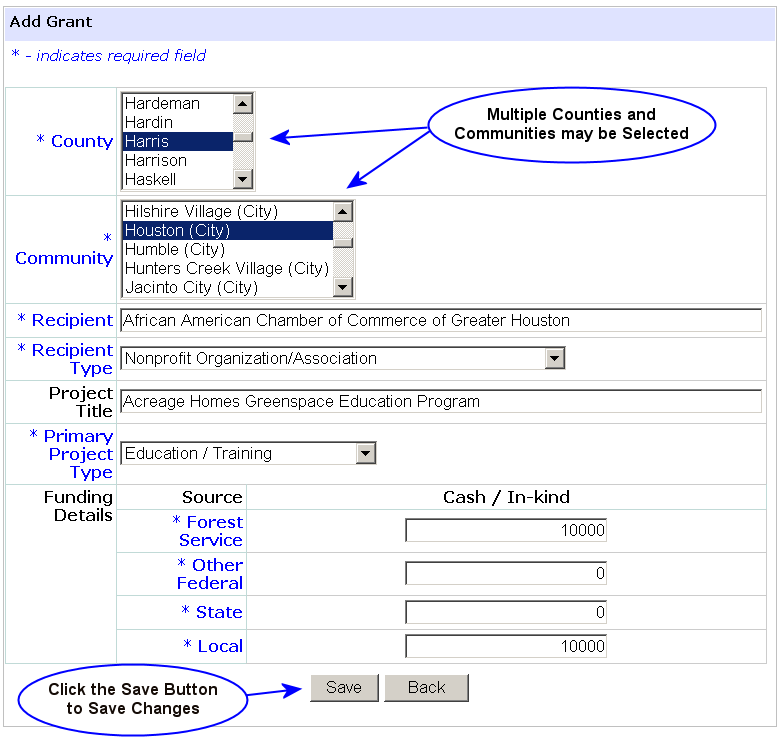
Step 3: In the County drop-down menu select the county for the grant recipient. Multiple counties may be selected, simply press the Ctrl or Shift key while left clicking on the county name.
Step 4: In the Community drop-down menu select the community for the grant recipient. Again, multiple communities may be selected by pressing the Ctrl or Shift keys while clicking on the community name. When selecting multiple communities, select only those that are receiving direct financial benefit from the grant.
Step 5: Enter the name of the recipient in the Recipient text box. Recipient names are limited to 150 characters, including spaces. For display/presentation purposes, please use proper case and avoid non-standard acronyms.
Step 6: Select the most appropriate recipient type from the Recipient Type drop-down menu.
Step 8: Enter a title for the project in the Project Title text box. Project titles are limited to 255 characters including spaces. Again, please use proper case and avoid non-standard abbreviations for display/presentation purposes.
Step 9: Select the primary project type from the Primary Project Type drop-down menu. Projects may have only one primary project type. Simply select the type that best identifies the purpose of the project.
Step 10: Enter the funding amounts by source. Cash and in-kind contributions should be aggregated and reported as a single total. Simply enter a zero when a source did not contribute funds to the project. The entered funding amounts should sum to the total cost of the project.
Step 11: Click the Save button. The entered grant information will be saved, and the Update Community Financial Assistance Information portlet will be displayed.
Editing a Grant
Instructions for editing a grant are as follows:
Step 1: From the State Update menu (Figure 9), click on the Community Financial Assistance link.
Step 2: Identify the grant to be edited within the Update Community Assistance Information portlet and click on the Recipient link (Figure 15). The Edit Grant form with the information for the selected grant will be displayed (Figure 17).
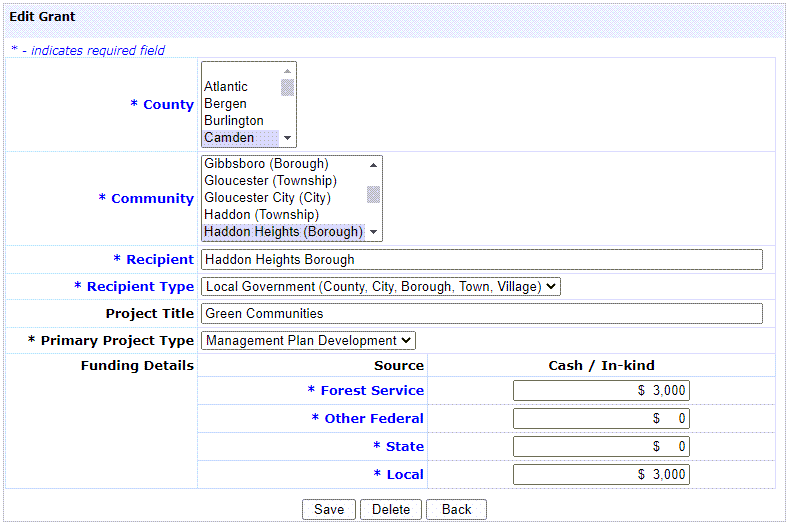
Step 3: Edit or update the displayed information as needed.
Step 4: Click the Save button. The updated grant information will be saved, and the Update Community Financial Assistance Information portlet will be displayed.
Deleting a Grant
Instructions for deleting a grant are as follows:
Step 1: From the State Update menu (Figure 9), click on the Community Financial Assistance link.
Step 2: Identify the grant to be deleted within the Update Community Assistance Information portlet and click on the Recipient link (Figure 15). The Edit Grant form with the information for the selected grant will be displayed (Figure 17).
Step 3: Click the Delete button. The selected grant will be deleted, and the Update Community Financial Assistance Information portlet will be displayed.